How to change the Motor & Seal
Pentair Superflo & Starite Super Max
Pac Fab & Pentair Pinnacle
STEP BY STEP INSTRUCTIONS
Step 1
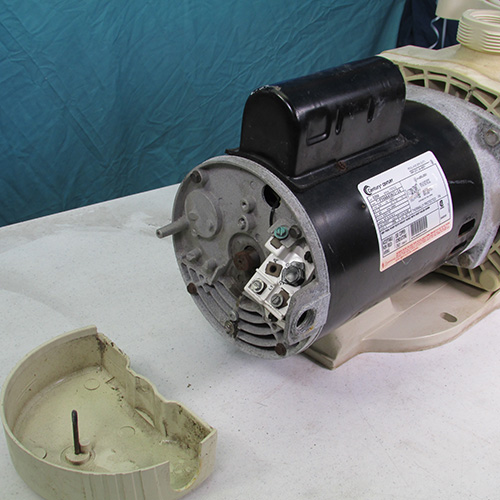
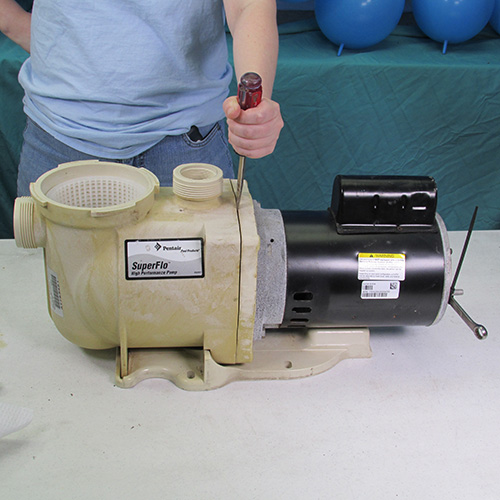
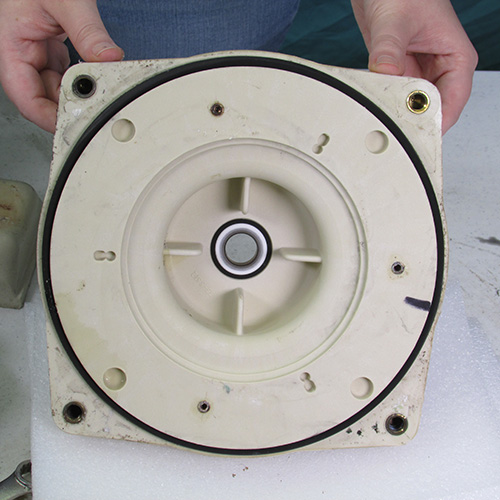
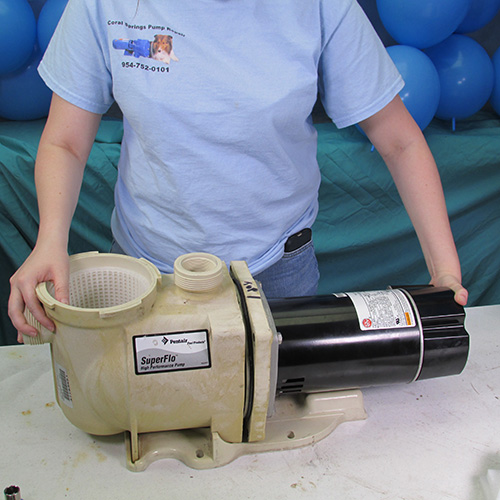
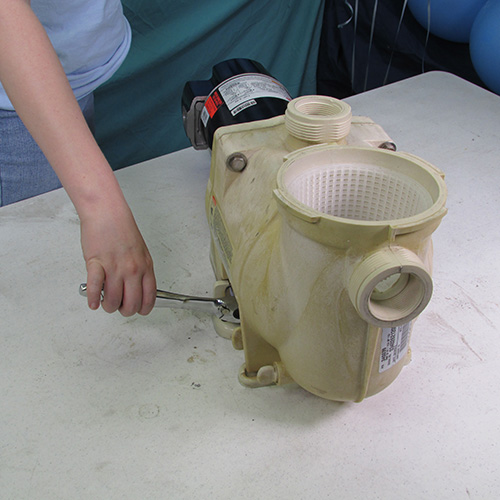
The first thing we do is remove the back cover from the motor so that we can prepare to lock the shaft. For the purposes of this demonstration we have the wet end assembly of the pump on our work bench. In a real life scenario the wet end assembly would remain connected to the pools plumbing and remain on the equipment pad in the pool owners yard.
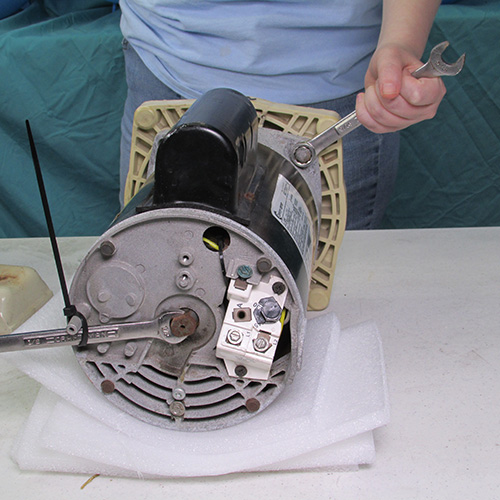
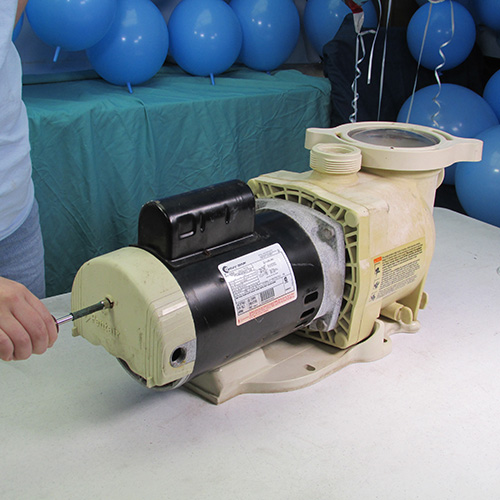
Step 2
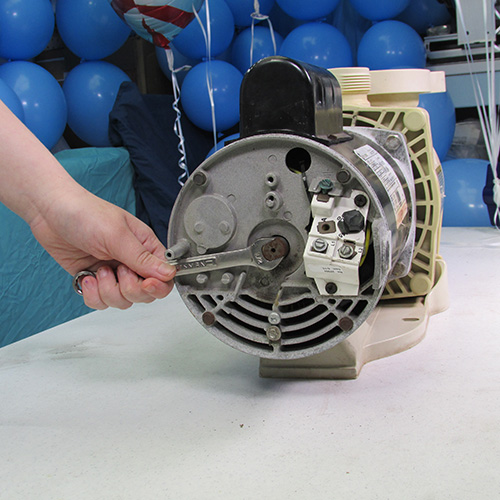
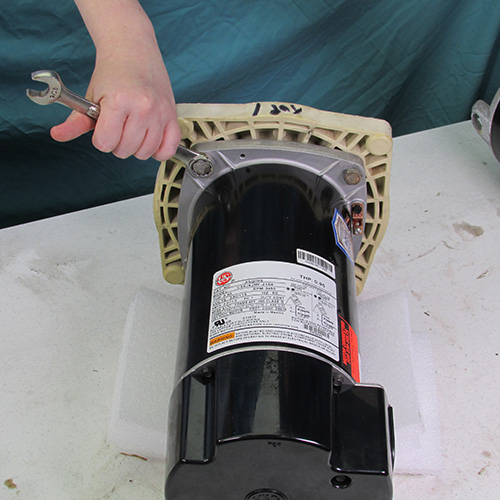
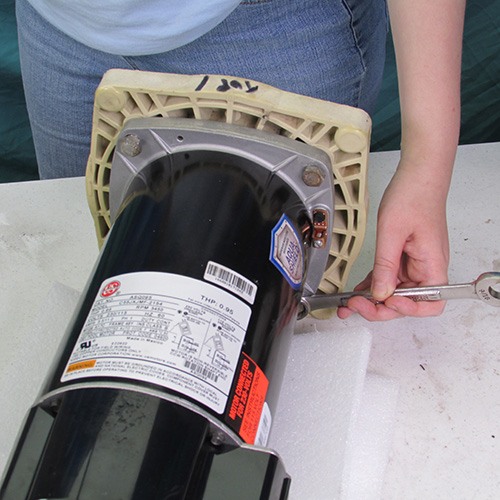
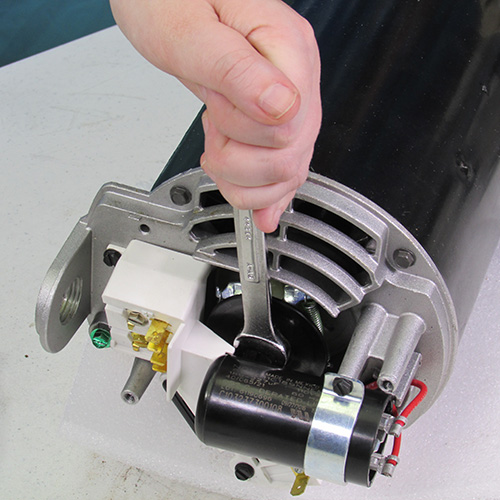
Insert a 1/2" open end wrench onto the flats of the rear of the rear of the shaft as shown. This will lock the shaft from turning
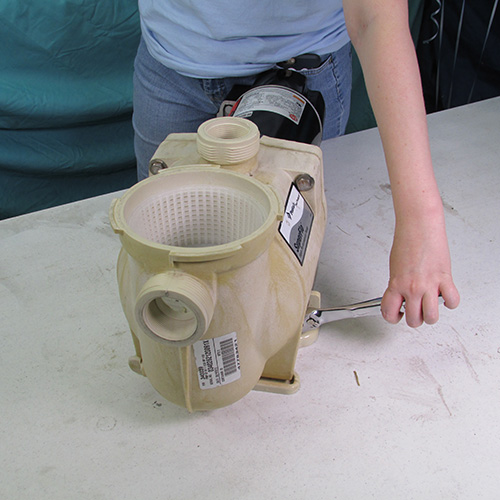
Step 3
Tie the wrench to the post of the motor with a zip tie. This will help keep the wrench in place during future operations.
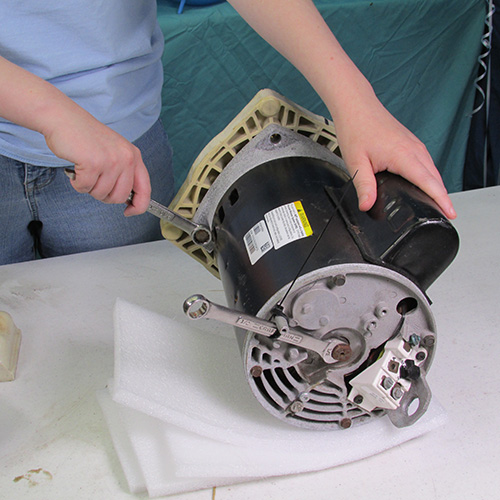
Step 4
Using a 9/16" wrench we will remove the four hex-head bolts as shown.
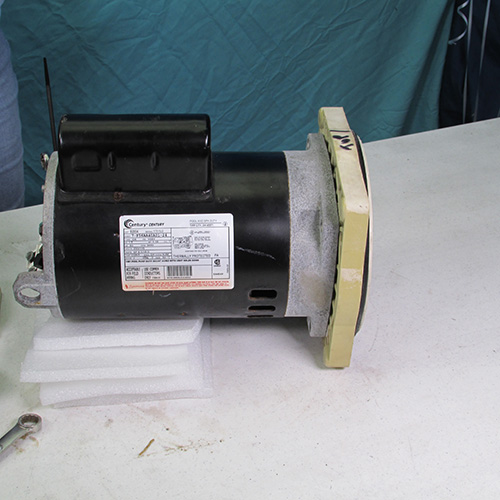
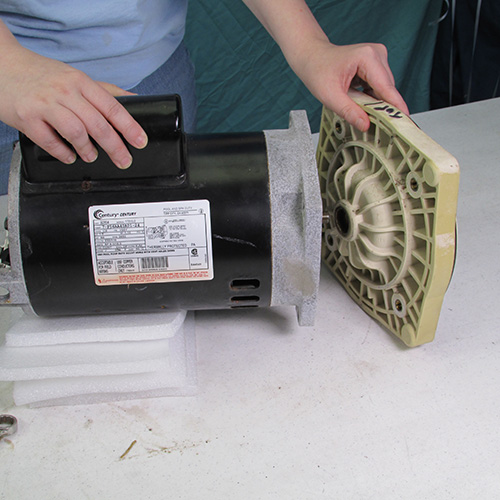
Step 5
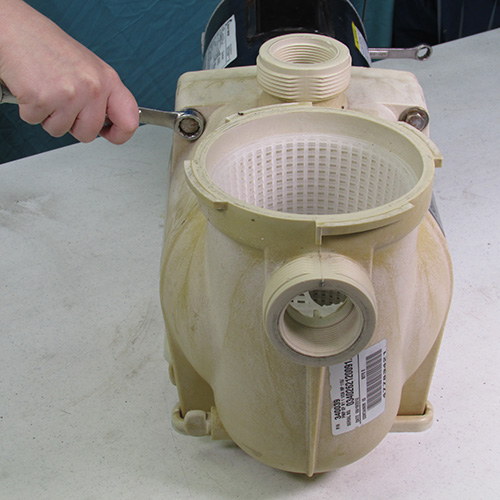
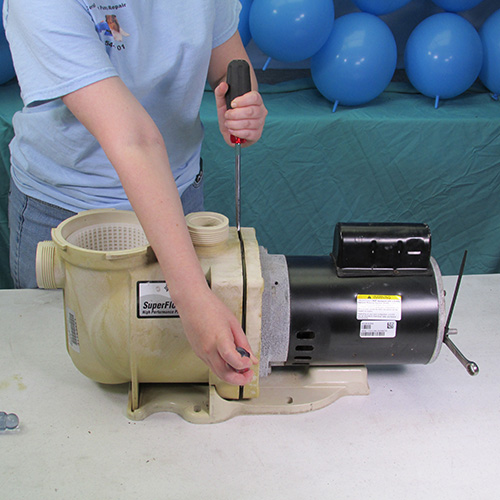
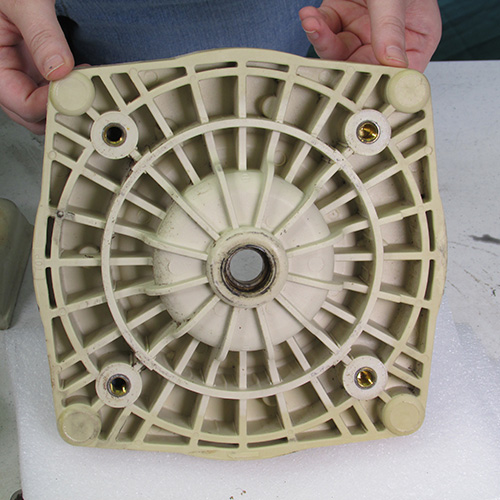
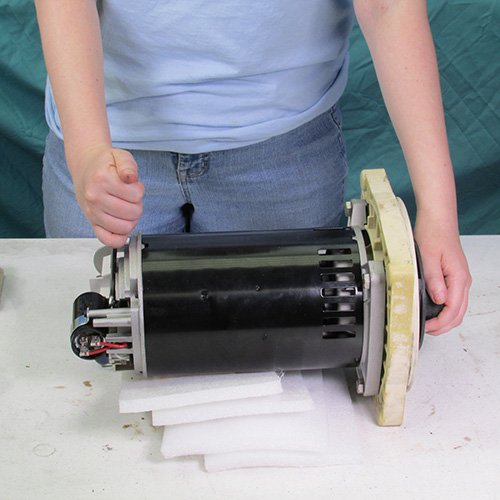
After the four bolts are removed we will separate the power unit from the front wet end housing.
Insert a screwdriver into the crack between the seal plate and wet end housing as shown.
Gently work your way around the diameter of the seal plate with the screw drivers until the rear power unit slides free.
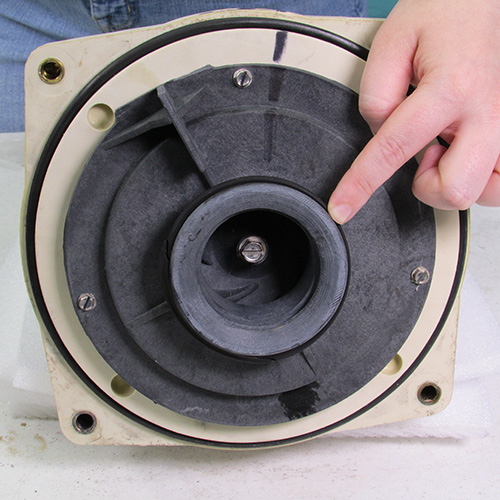
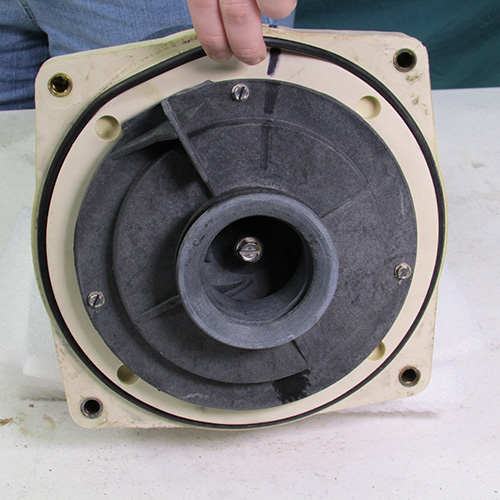
Step 6
Take a marker and make a line across the top portions of the seal plate and diffuser to enable you to correctly reinstall these parts later. Mark it top
Step 7
Remove the three screws holding the diffuser as shown.
Step 8
Grasp the diffuser and pull it away from the seal plate as shown.
Step 9
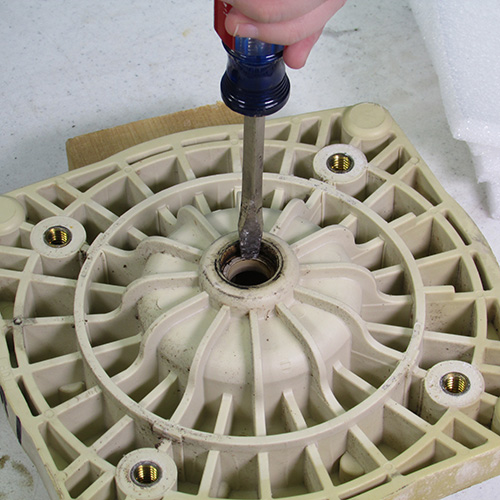
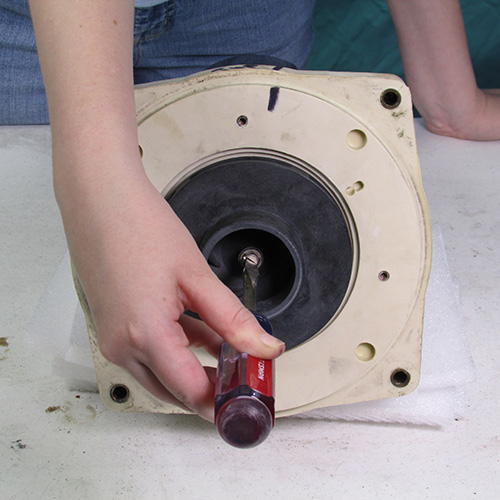
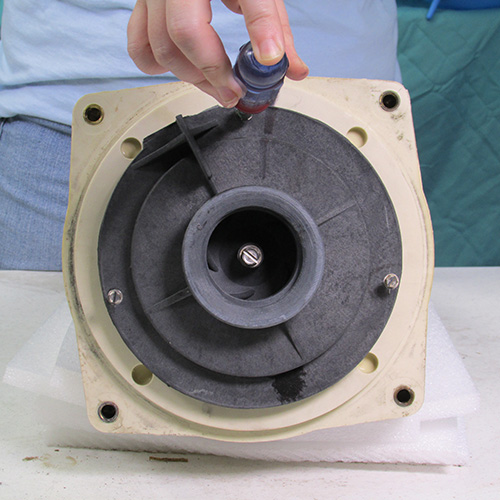
Next we must remove the center screw holding the impeller on. Be aware that this is a left hand or reverse thread screw. That means to remove it you must turn it in a clockwise or right orientation. Remove the screw with the appropriate tool either a wrench or a screw driver as necessary.
Step 10
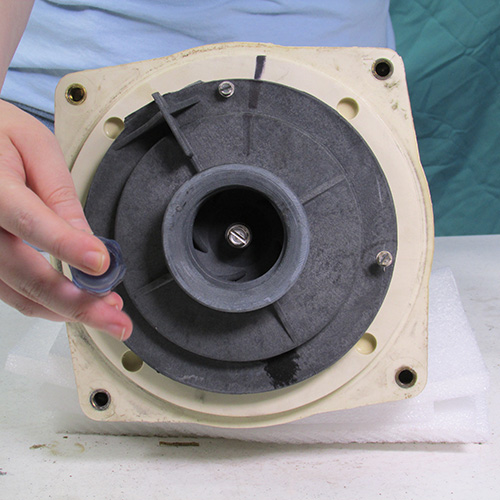
This is what it will look like when the screw is removed from the center.
Step 11
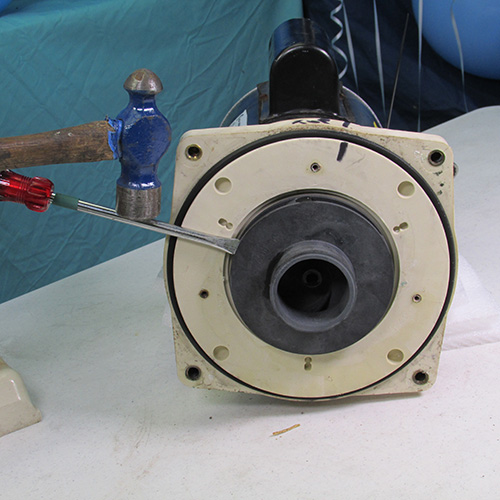
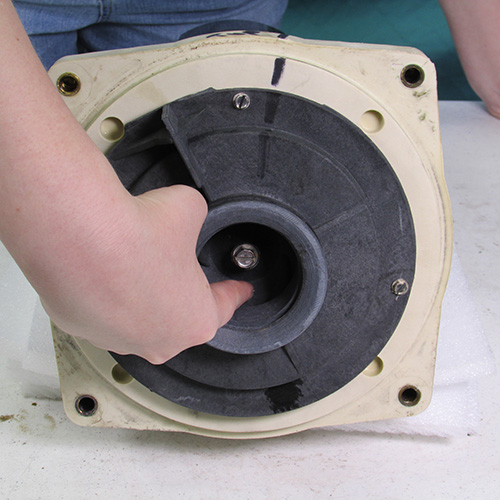
The next thing we must do is remove the impeller. This is accomplished by rotating the impeller in a counter clockwise direction. This can be done by grasping it with your hand or you may choose to use large channel lock pliers or a strap wrench. A method that we found that works very well is to simply insert a large flat bladed screwdriver into the edge of the impeller and strike the screw driver with a metal hammer. The resulting impact force will usually jar loose even the most stubborn impeller. Then simply twist it off in a counter clockwise or left orientation. Always use appropriate body and eye safety equipment when using these tools.
Step 12
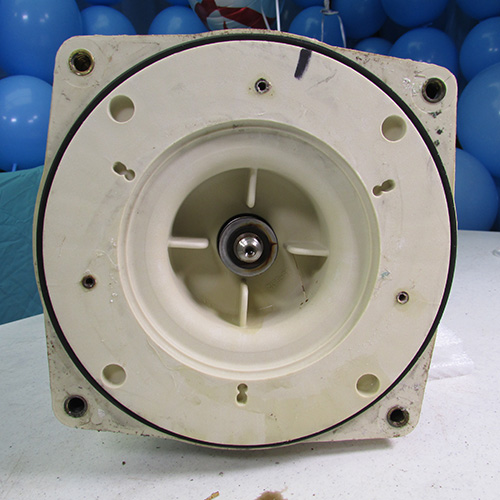
This is what the impeller will look like once it is removed.
Step 13
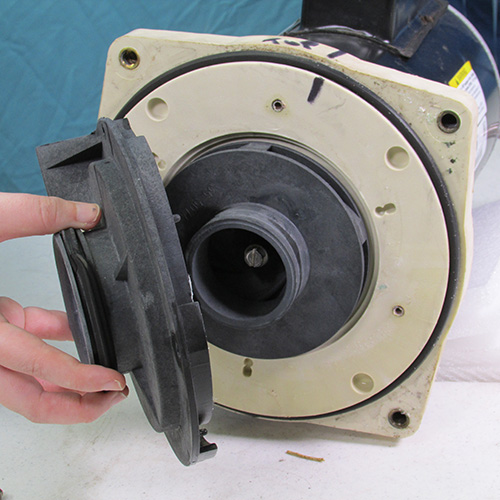
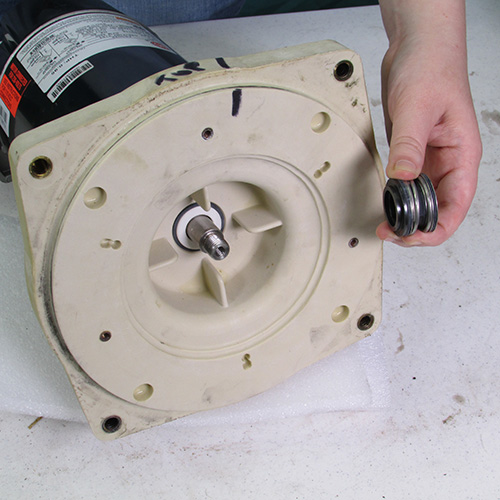
The next step is to remove the shaft seal we do this by prying the seal head away from the seal seat with two large screwdrivers as shown.
This is what it looks like when the seal head is removed.
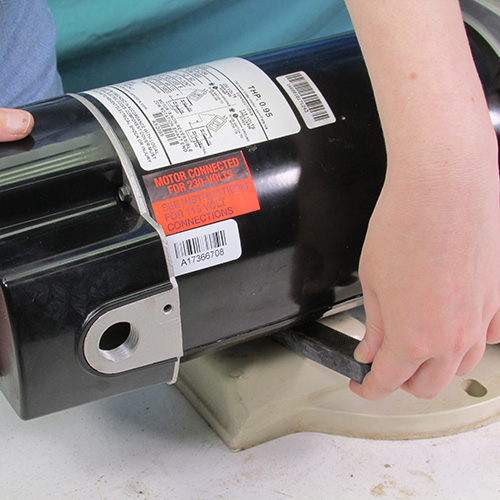
Step 14
Next we remove the four 9/16" motor mounting bolts. they will be removed in a left or counter clockwise orientation. Sometimes these bolts may be difficult to remove in which case you may have to tap the end of the wrench with a rubber mallet or block of wood to impact the bolts loose.
Step 1
Step 15
Once the four bolts are removed, remove the seal plate assembly by gently tapping it away from the motor with a rubber mallet or piece of wood.
Step 16
The next thing we must do is to remove the seal seat assembly from the seal plate. We accomplish this by driving the seal seat out of the plate with a screwdriver as shown. Be sure to remove all parts of the seal seat including the ceramic portion and the black round rubber retaining washer or ring.
Step 17
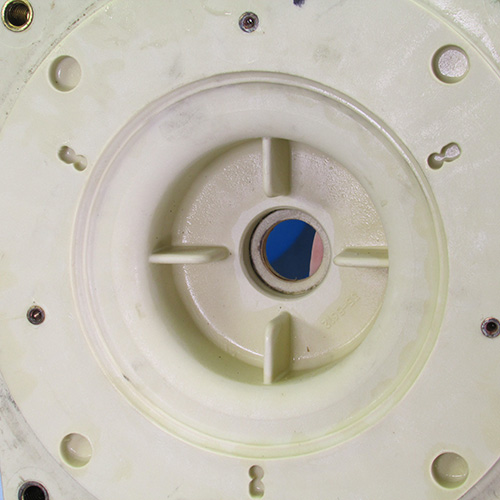
Once we have removed the seal seat from the seal plate we must inspect both sides of the seal plate pay particular attention to the seal bore. Check for any evidence of deformation caused by heat damage from a melted seal or overheating. Do not use a seal plate that is damaged.
Step 18
Inspect the difusser & impeller thoroughly look for any evidence of cracking or damage. Check the internal threads of the impeller to make sure they are not cracked or stripped.
Step 19
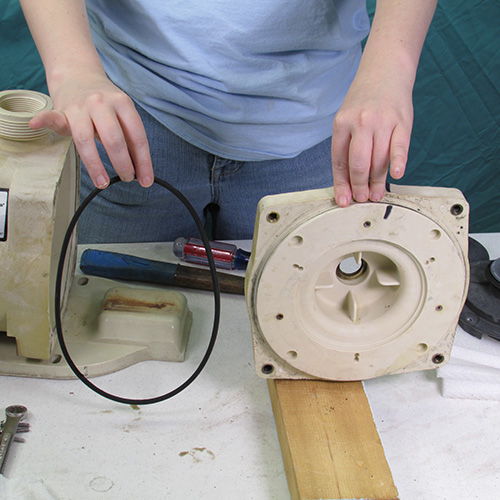
Remove the O-rings from both the diffuser and the seal plate and set them aside. It is recommended that when you replace the motor that you should replace the seal and the O-rings.
Step 20
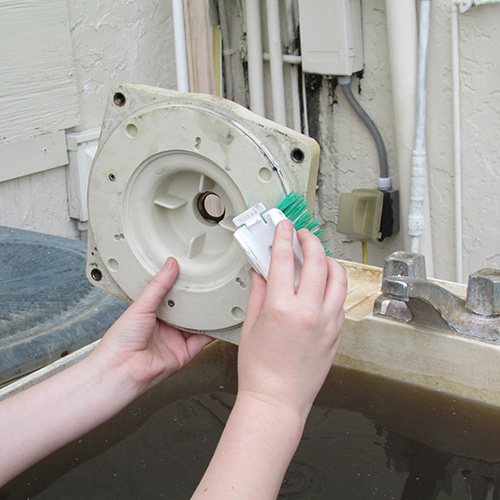
Wash the seal plate assembly thoroughly with soap and water.
Reinspect the seal seat bore and look for any evidence of deformities caused by overheating or melting.
Step 21
Remove the new seals from the box and inspect them for any damage.
Step 22
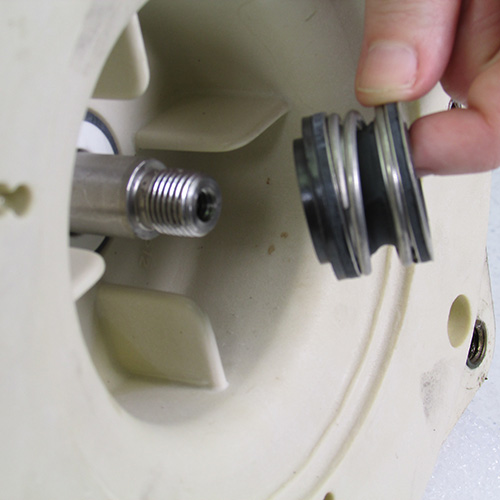
Take the new seat seal assembly and lubricate the rubber portion with soapy water. Do not use grease, oil, WD40, Teflon, silicone, or any petroleum product. It is ok to use an approved rubber lubricant such as P80 or US seal seal lube but most homeowners do not have access to this so soap and water should work fine.
Step 23
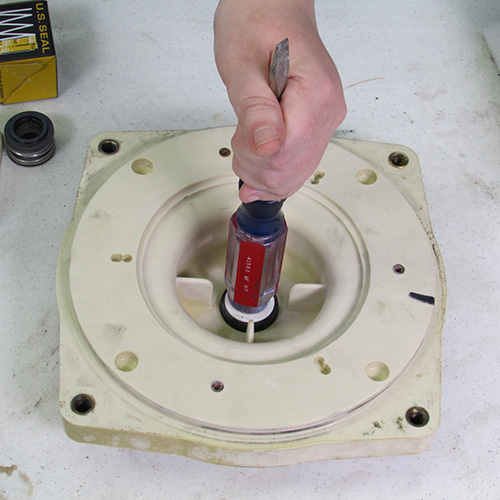
Using the rounded butt of a screwdriver carefully press the seal seat into the seal plate as shown.
Step 24
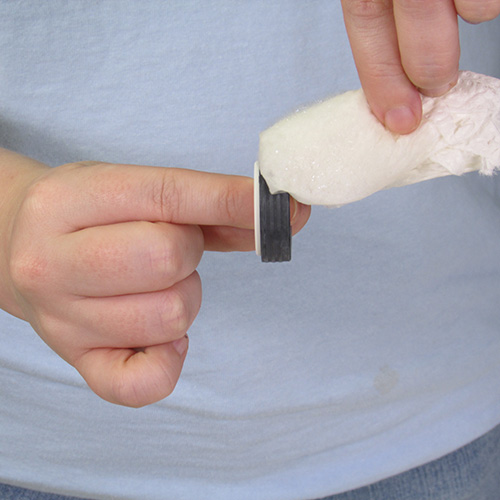
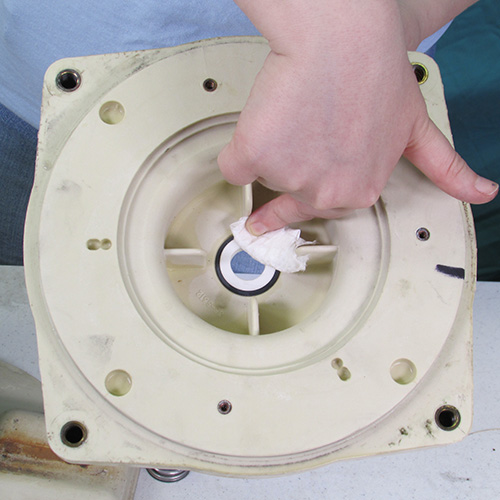
Carefully clean the seal seat surface with rubbing alcohol and a clean cloth or cotton swab. This is a very important step as the seal assembly must be perfectly clean when reassembled. Even the smallest particle of dirt on the seal surfaces will shorten the service life of the seal.
Step 25
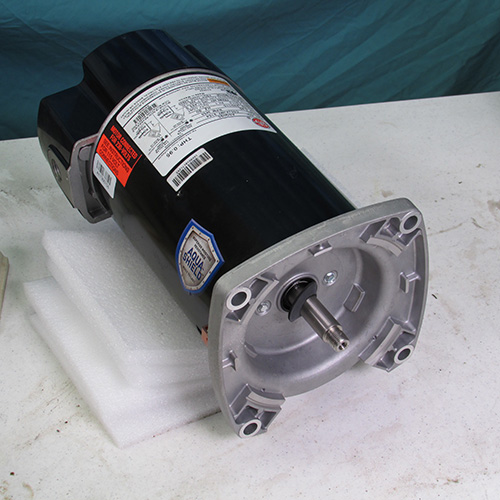
Take your new motor out of your box and set it on your work bench.
Step 26
Insert the seal plate assembly up against the front facing of the motor as shown. Use the index marks you made previously as an indicator of which side is the top of the seal plate.
Step 27
Using a 9/16" wrench install the four 9/16" bolts attaching the seal plate to the motor as shown. Tighten these bolts gently and firmly.
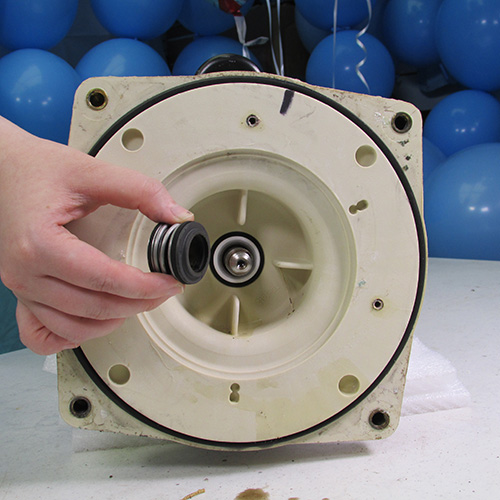
Step 28
The next step is to install the head of the seal. At this time it is best to carefully clean the carbon ring with alcohol.
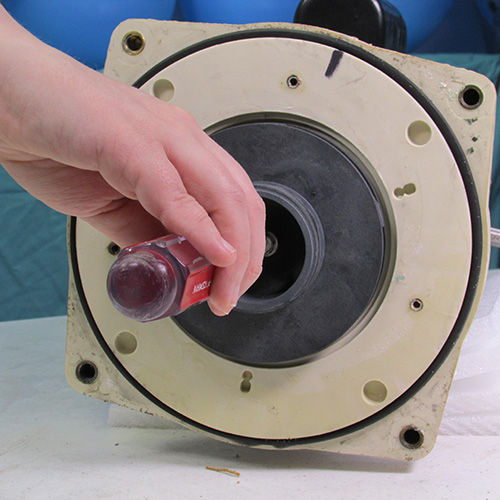
Step 29
Carefully slide the seal onto the shaft as shown use caution so the carbon ring does not accidentally contact the end of the shaft.
Step 30
Gently and carefully press the seal in place as shown.
Step 31
The next step is we will reinstall the impeller. This is done by simply turning it in a clockwise or right hand direction and tightening it up hand tight.
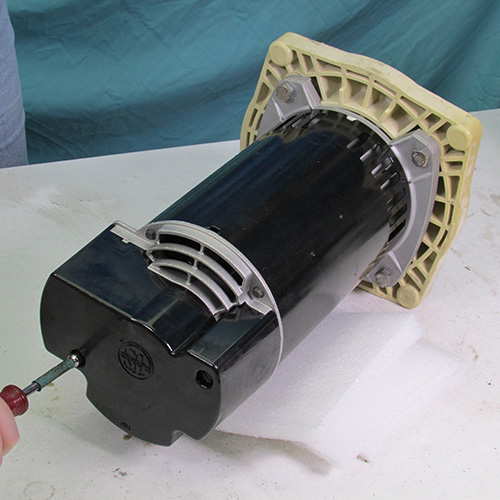
Step 32
Remove the rear cover of the new motor as shown.
Step 33
Using a 7/16" wrench lock the rear shaft of the motor to prevent it from turning.
Step 34
While holding the 7/16" wrench with one hand tighten the impeller with your other hand. Just turn it in a clockwise direction hand tight is sufficient.
Step 35
Reinstall the back cover.
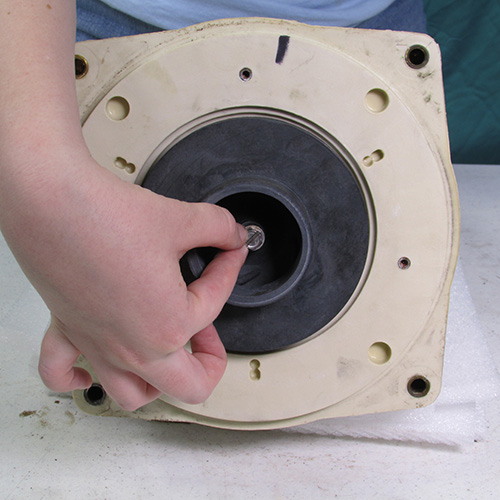
Step 36
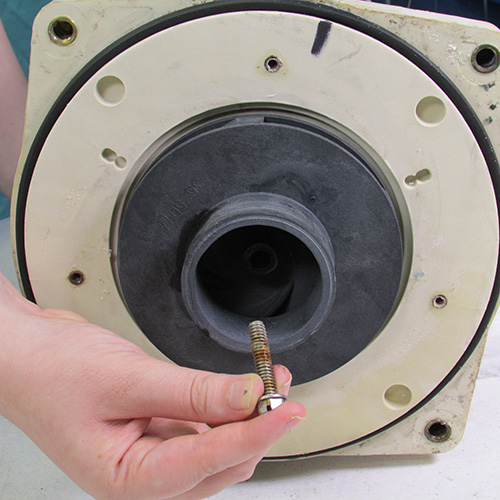
We will now reinstall the impeller lock screw.
Insert the impeller lock screw into the center hole of the shaft. Remember this is a left hand or reverse thread screw so to tighten it we must turn it in a counter clockwise or left hand orientation.
Tighten the screw with a screwdriver or appropriate tool as needed. Remember to tighten to the left or counter clockwise.
Step 37
In the next step we will reinstall the diffuser as shown. Line up the index marks we made with the marker so the orientation will be correct.
Step 38
Tighten the screws with a screwdriver or appropriate tools.
Step 39
The next step is to replace the rubber O-rings on the seal plate and on the diffuser. It is ok to lubricate these with Teflon or magic lube.
Step 40
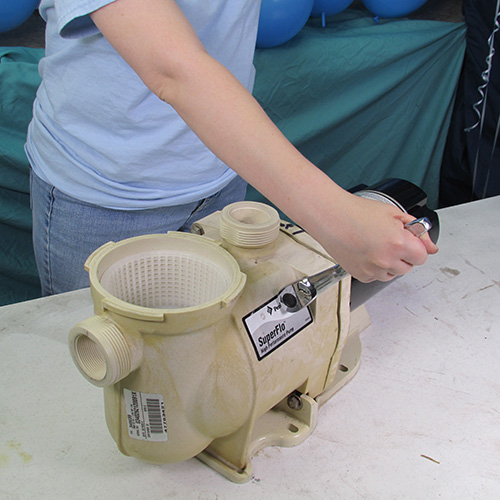
Place the power unit close to the wet end assembly as shown.
Step 41
Gently press the power end assembly into the wet end assembly as shown.
Step 42
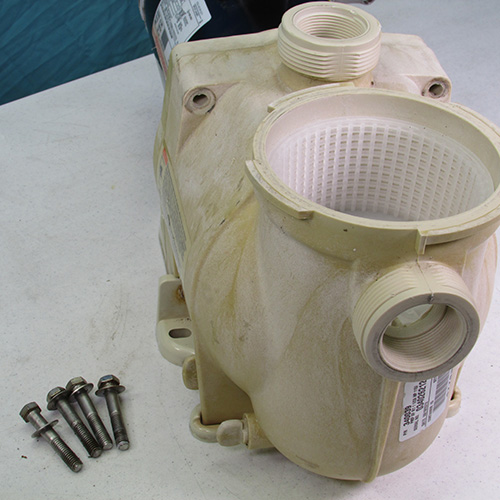
Install the four 9/16" bolts we had removed previously. Tighten these bolts in a criss cross pattern.
Step 43
Install a rubber pad on the base assembly as shown.
Step 44
Be sure to fill the pump with water before starting it up.