How to change the Motor & Seal
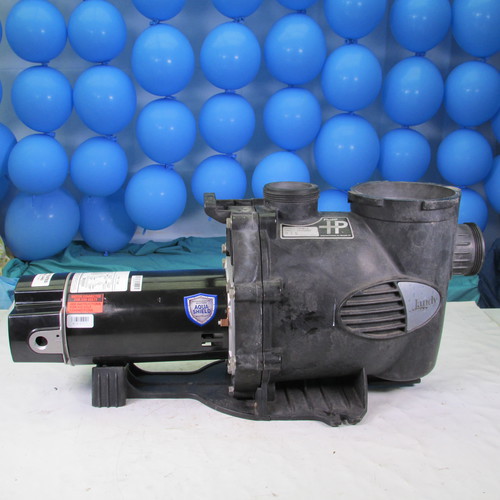
Jandy/Zodiac Plus HP and Stealth Pump
This instruction set covers both the Jandy
Plus HP 2006 & Newer PHPM and PHPF
&
Stealth 2006 & Newer SHPF and SHPM
Both models share the same power unit, only front wet end assembly is different
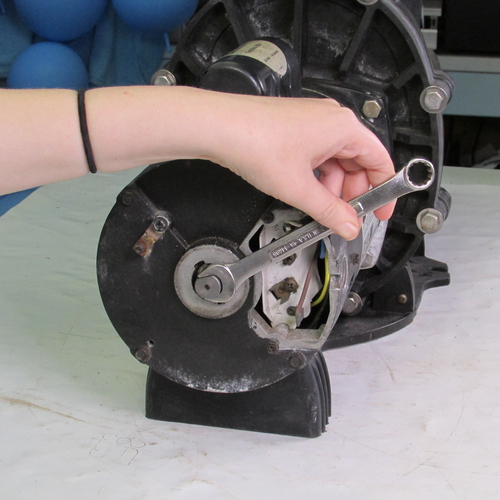
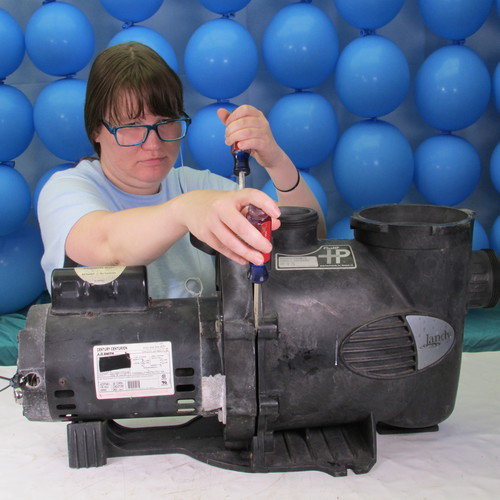
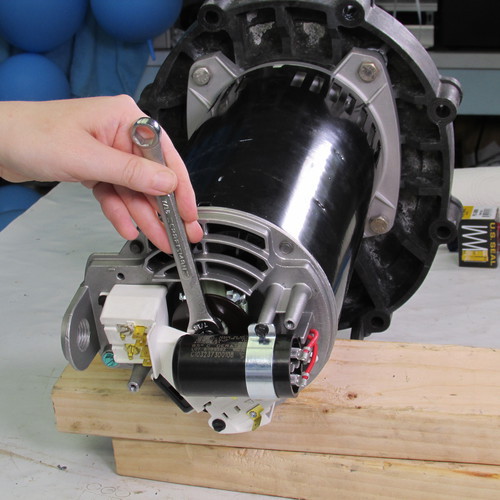
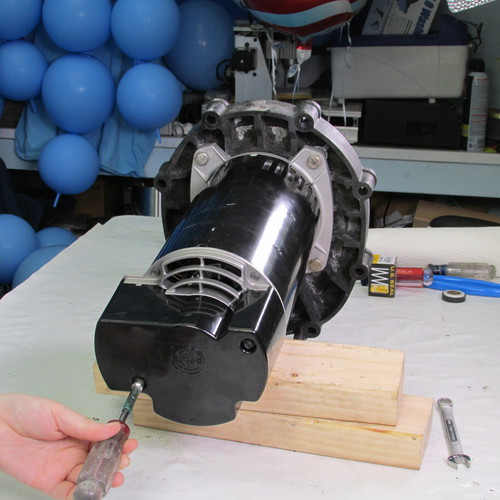
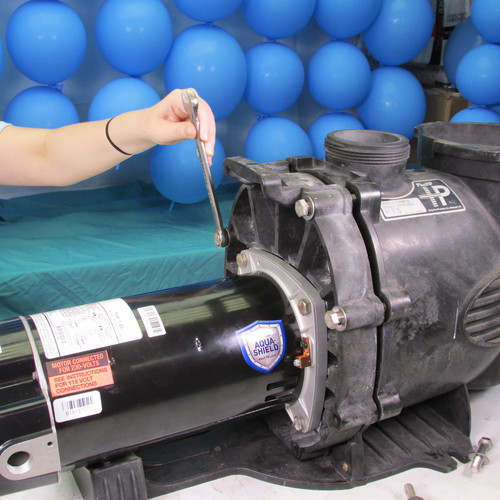
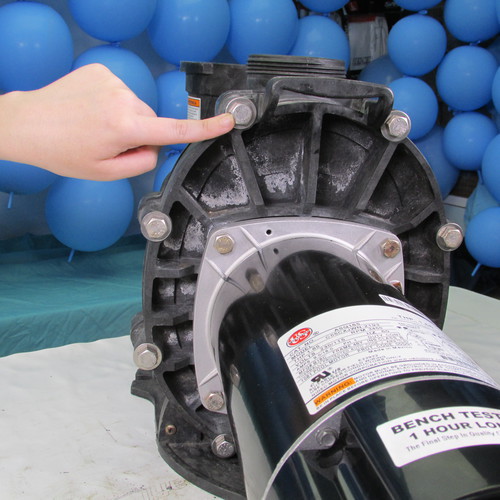
Step 1
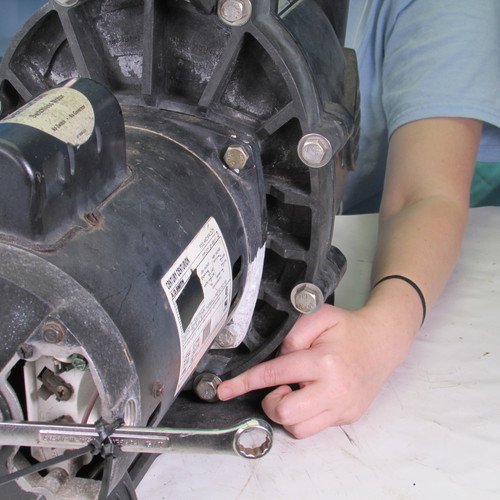
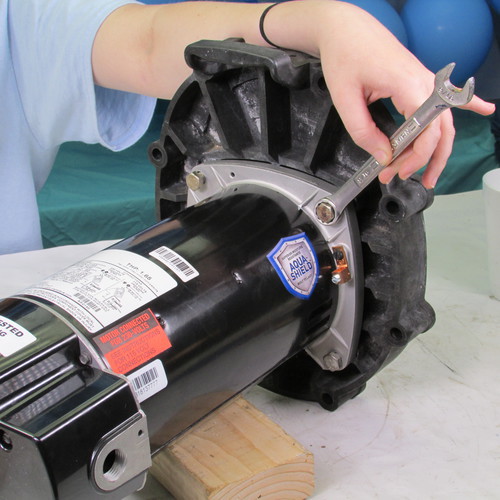
The first thing we must do is to lock the shaft of the motor from turning. This is done by inserting an open end wrench as shown
Attach the wrench to the motor housing as shown with a couple of zip ties.
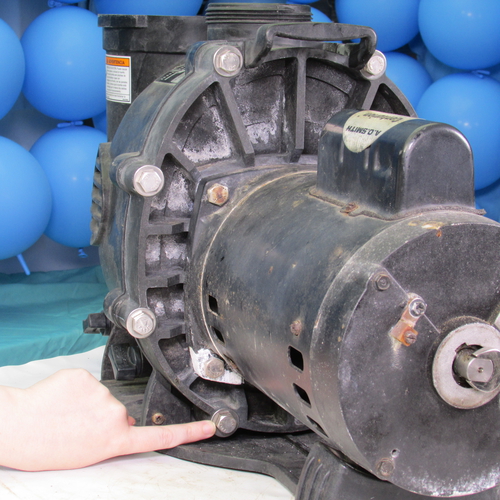
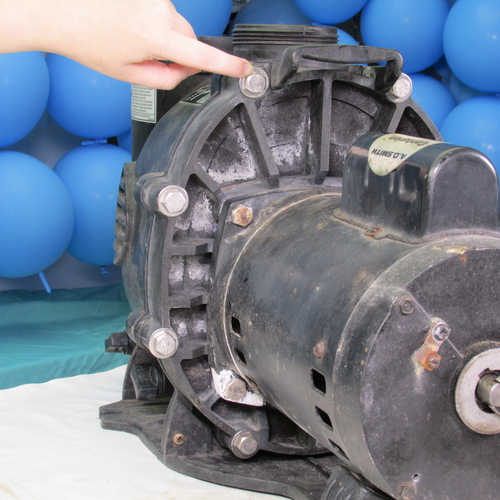
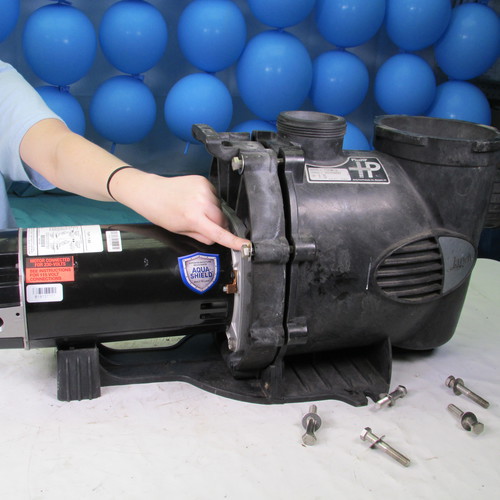
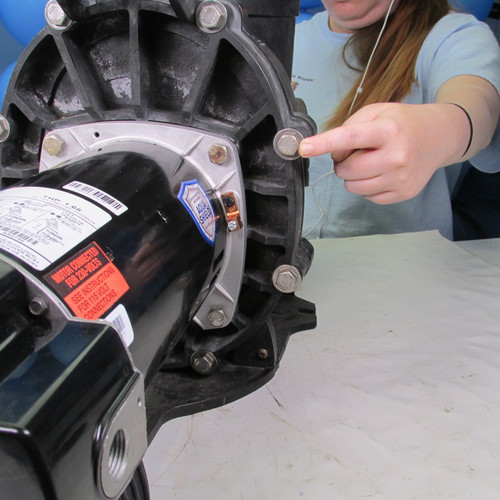
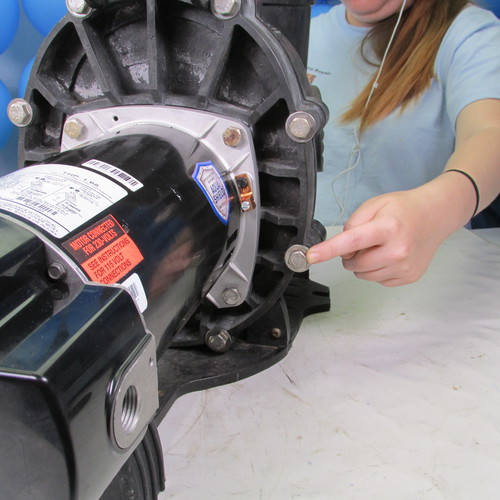
Step 2
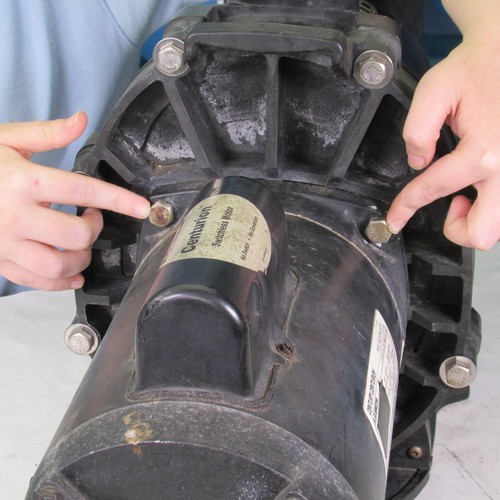
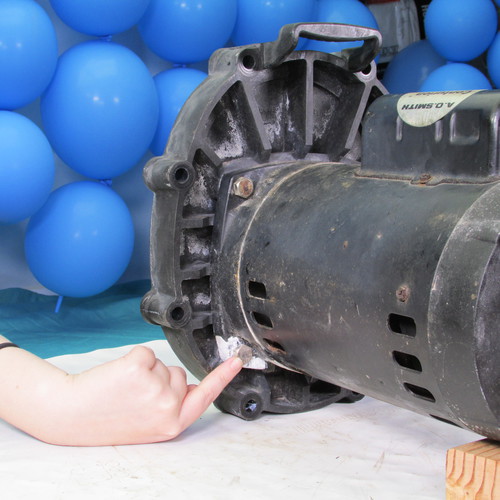
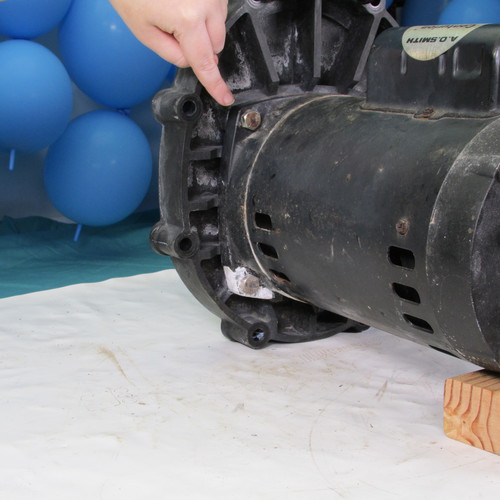
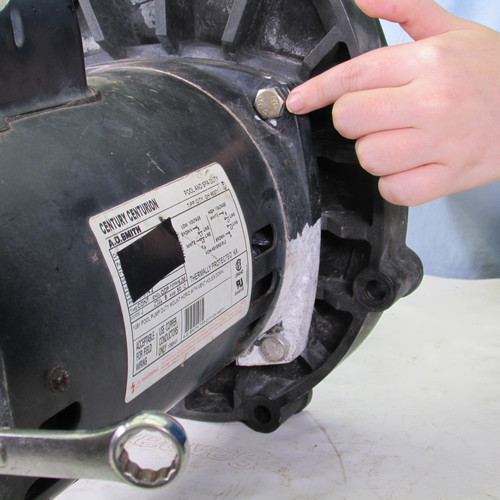
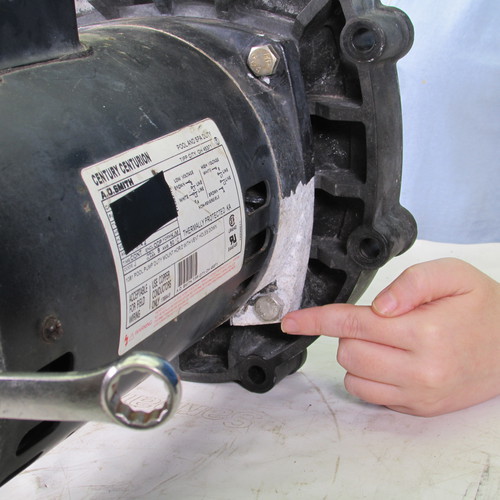
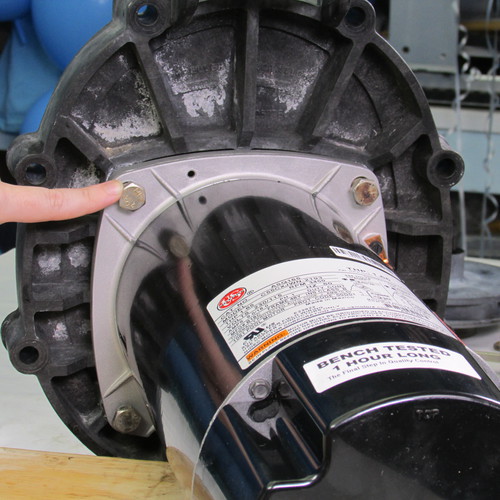
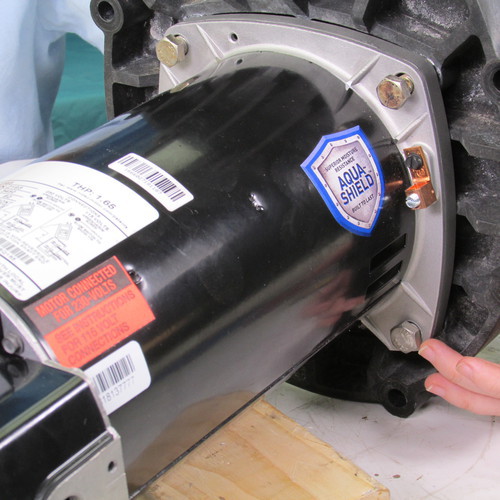
Next we will remove the (8) 9/16 bolts holding the seal plate to the pump wet end housing.
Do not remove the (4) bolts that hold the motor to seal plate at this time.
Bolt 1
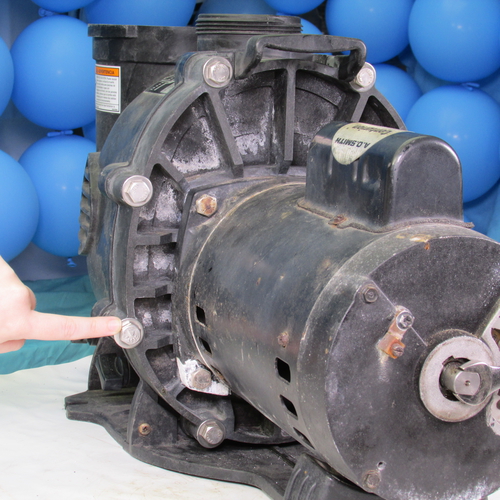
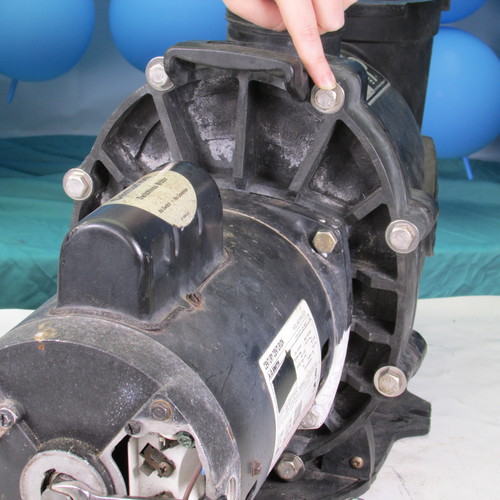
Bolt 2
Bolt 3
Bolt 4
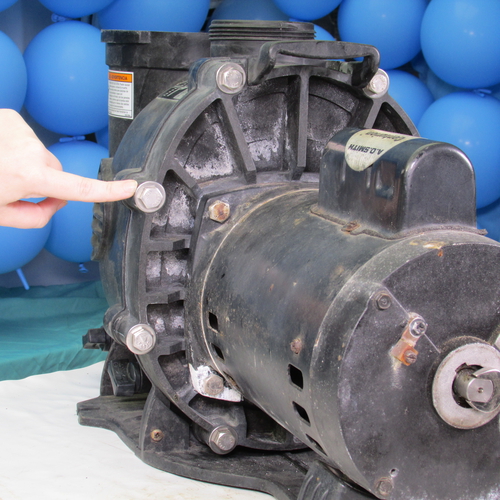
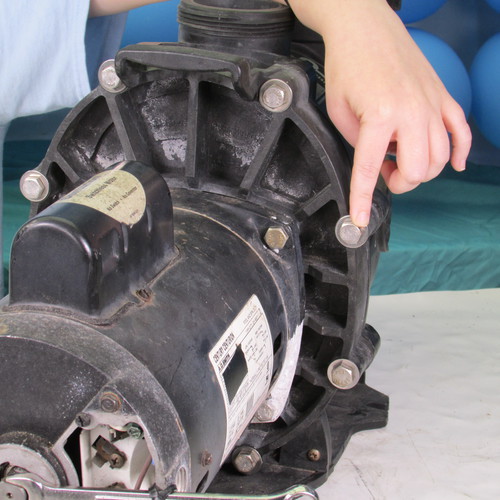
Bolt 5
Bolt 6
Bolt 7
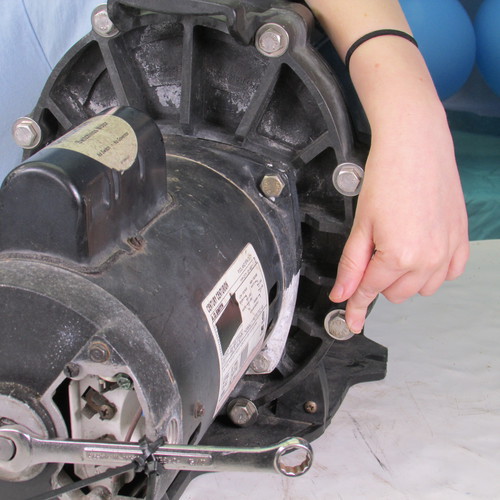
Bolt 8
As we said before, do not remove the (4) bolts
attaching the motor to the seal plate---That will be done at a later step
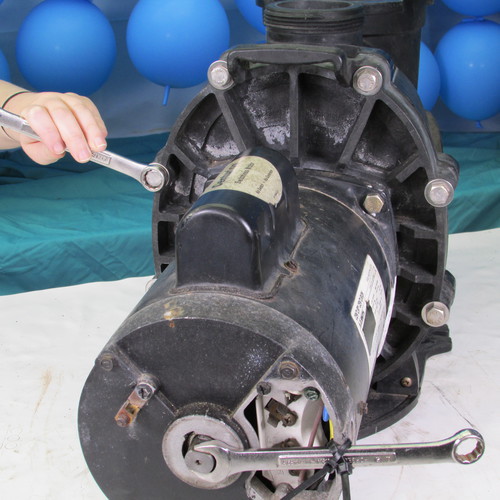
Use a 9/16 wrench or a socket wrench with a ratchet to save time. If the pump is parallel to the house, you may have to use a socket with a long extension.
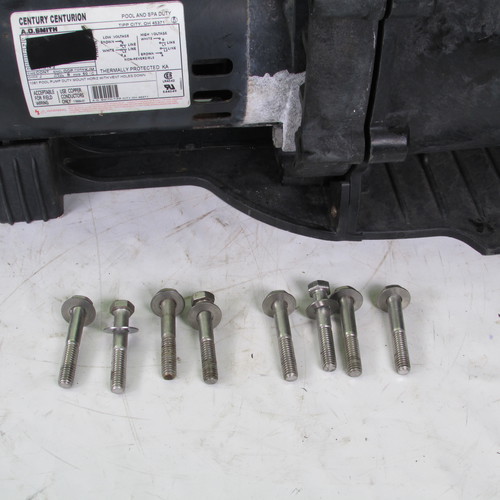
Set the bolts and washers aside for reinstallation later
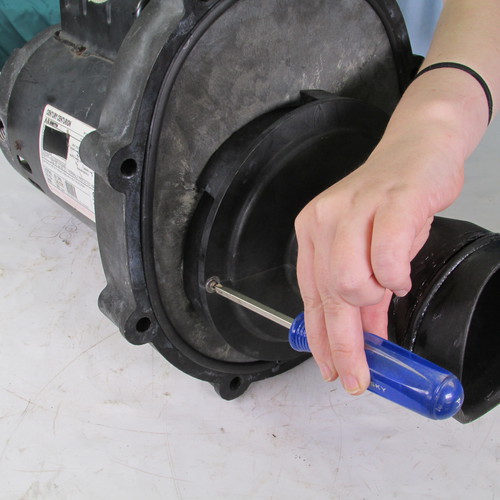
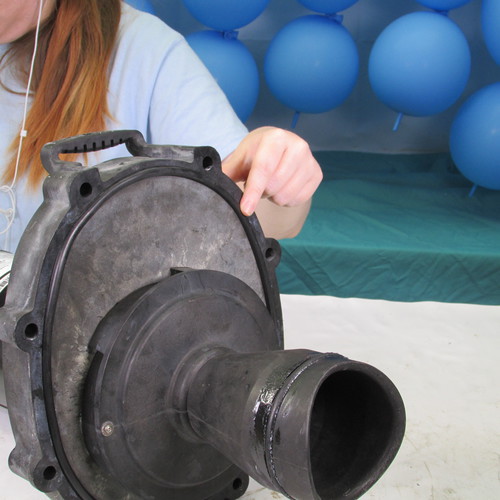
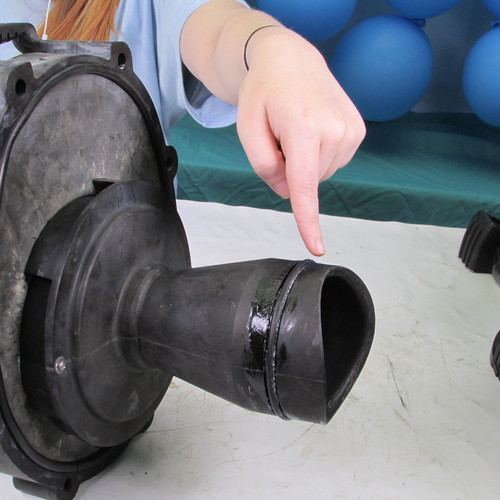
Step 3
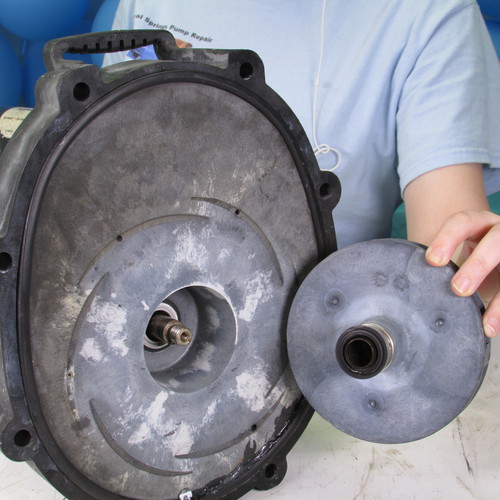
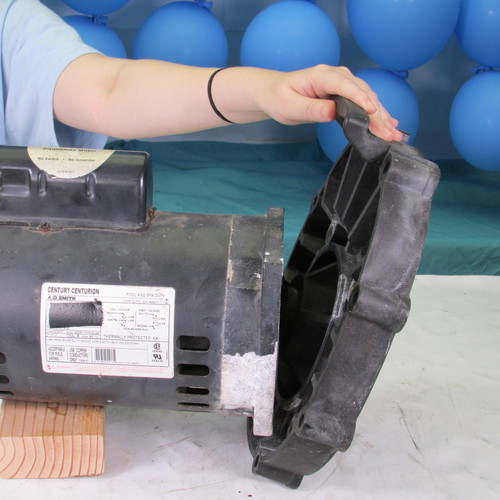
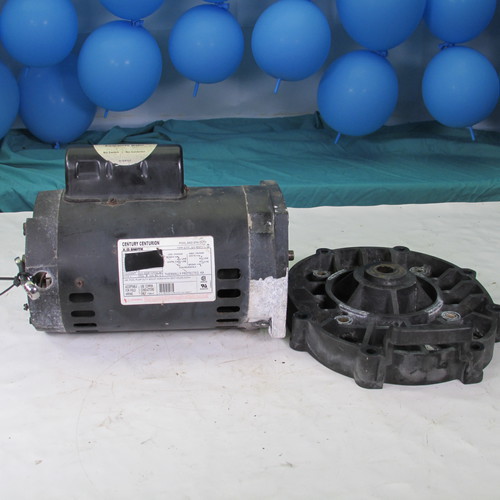
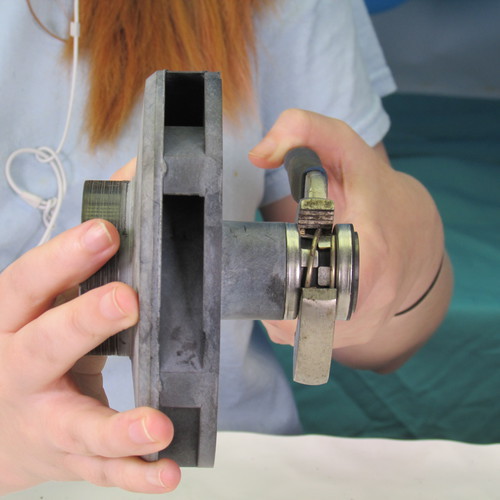
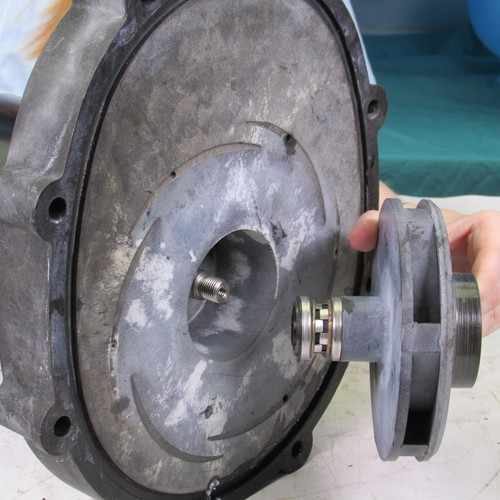
Next we will separate the power unit containing the motor & impeller by carefully inserting a couple screwdrivers around the edge of the seal plate as shown and gently pry back...The key word is gently, work slow and carefully to slowly wiggle back the power unit
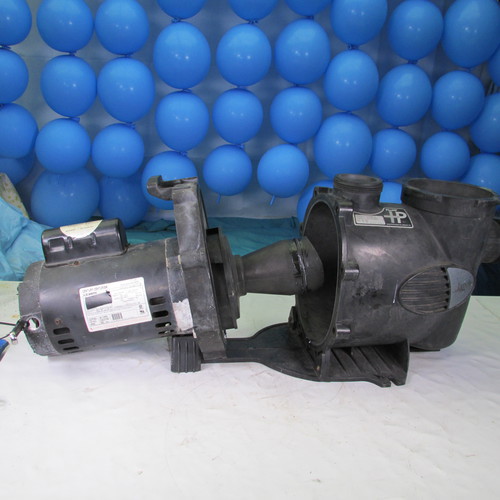
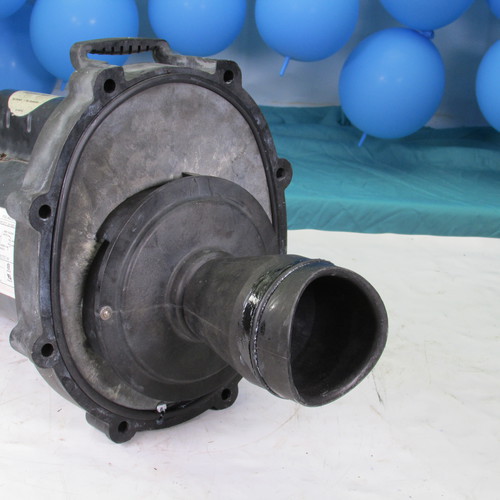
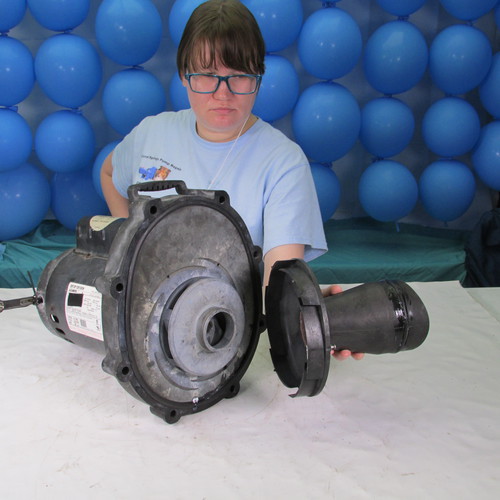
This is what it looks like with the power unit separated. For the purposes of the demo we have the front wet end assembly on the work bench. In a real world senario the wet end will usually remain connected to the pool plumbing on the equipment slab in the pool owners yard
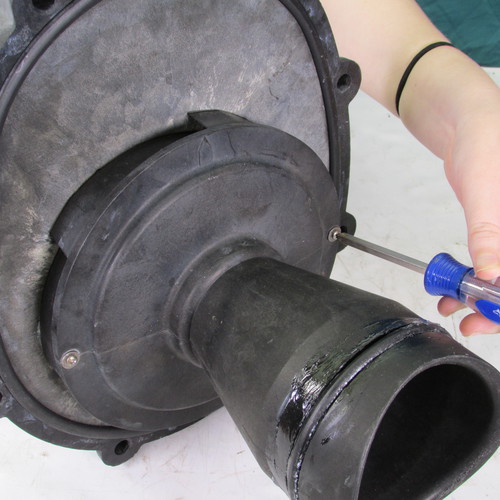
Step 4
Next we will remove the (2) diffuser screws by turning them counterclockwise
Remove diffuser by pulling it forward
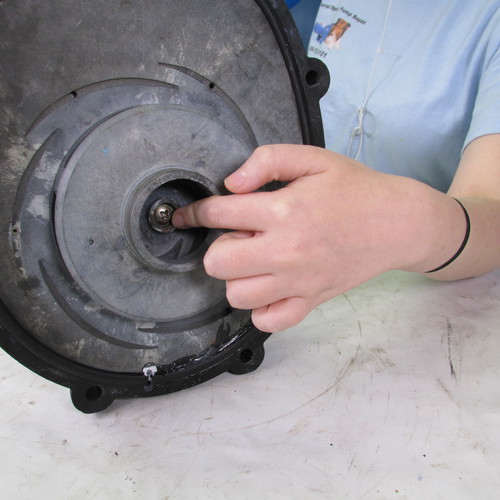
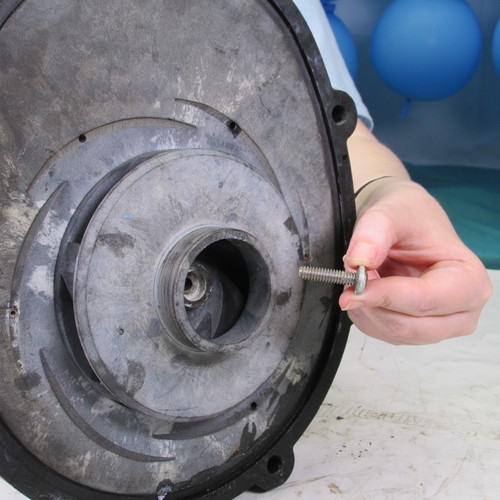
Step 5
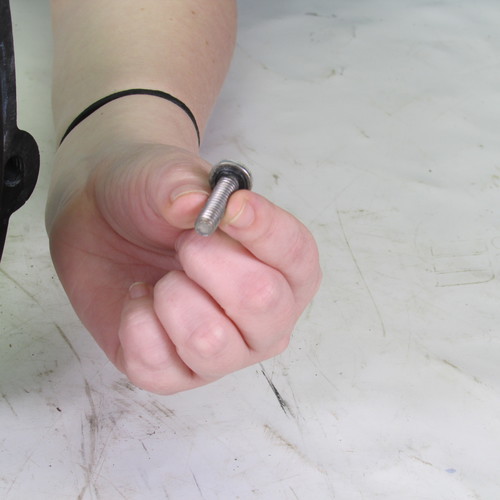
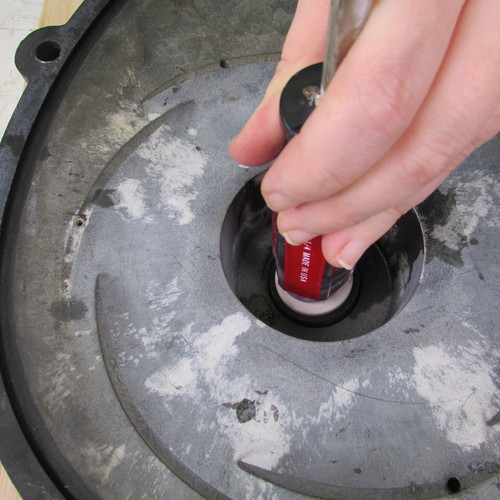
Next we must remove the impeller lock screw.
This is a left hand or reverse thread screw, that means you must turn it clockwise, or right to loosen it. Most screws are a #3 phillips while some may be slotted or hex head
Step 6
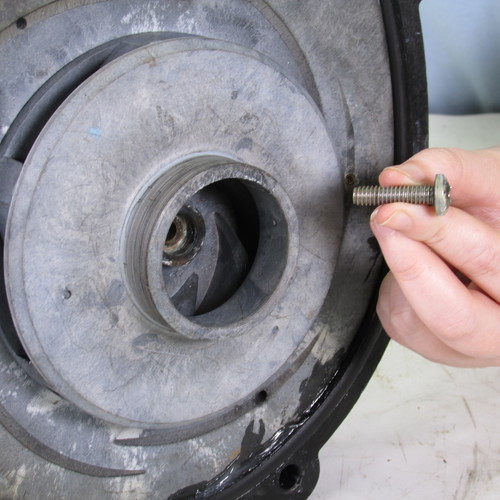
Very Important
Notice that the screw has a little rubber washer or
O'ring under the head... Inspect this very carefully and replace it if it is damaged or missing.
DO NOT IGNORE THIS STEP.
If you do the pump will have a very tiny internal leak that will destroy the new motor and it will probably not be covered by warranty because the manufacturer will say it was water damaged even if it is only a couple of months old
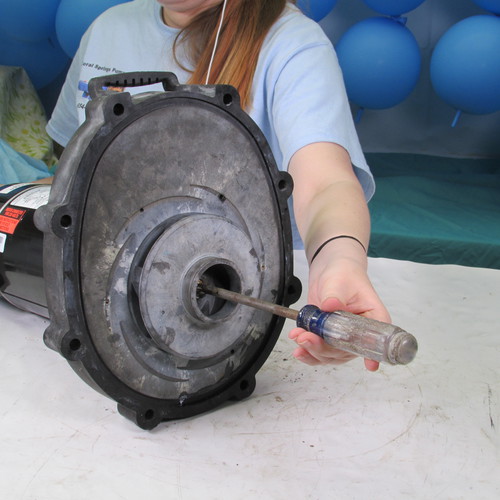
Step 7
Next we will remove the impeller. This is done by rotating it counterclockwise or to the left. You can try large channel lock pliers or a strap wrench, however a method that we have found very sucessful is to insert a large flat blade screwdriver into the outer edge of the impeller and strike the screwdriver shaft close to the impeller. The resultant impact force will loosen the most stubborn impeller. Then simply twist it off with a gloved hand in a counter clockwise direction. Always use proper body and eye protection when using these tools
Step 8
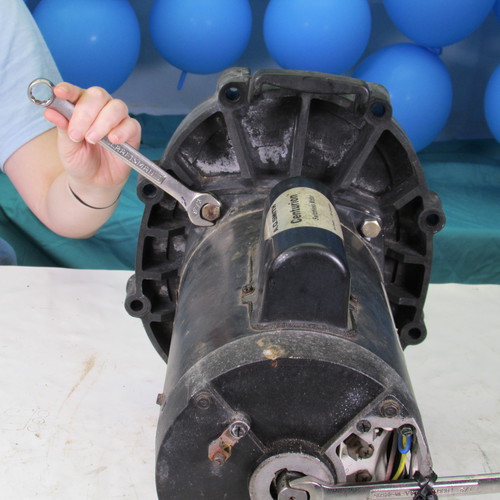
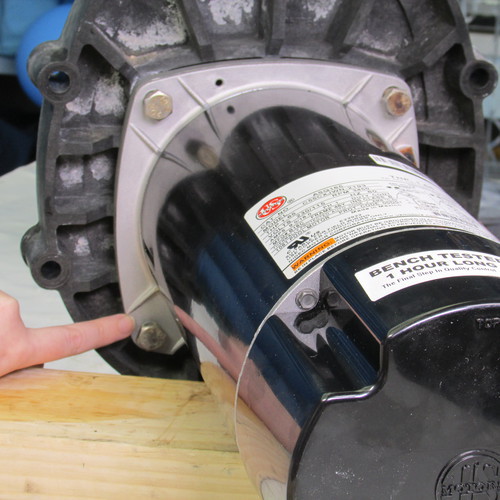
Next we will remove the 4 bolts that attach the motor to the seal plate. This may be somewhat of a challenge on certain motors because you may be limited to using an open end wrench because of space limitations. A ratchet with a thin wall socket may help
Bolt 1
Bolt 2
Bolt 3
Bolt 4
These bolts are removed by rotating counterclockwise or to the left
Step 9
Next, remove the seal plate from the motor by sliding it forward away from the motor, if it is stuck tap it away with a rubber mallet or a block of wood.
Do not hit it with a metal hammer
Step 10
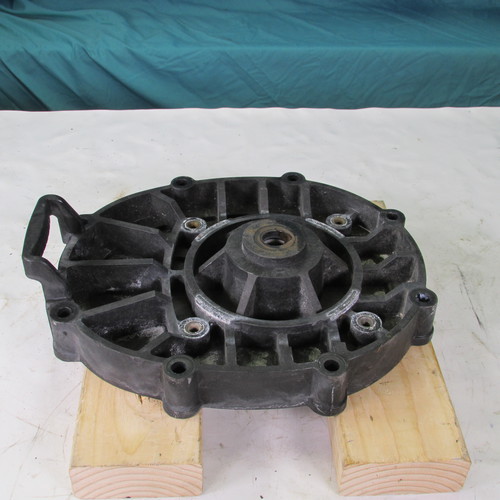
Lay the seal plate on a couple blocks of wood as shown.
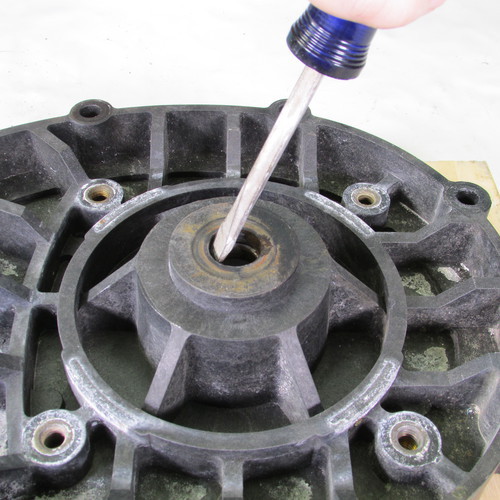
Insert a flat blade screwdriver against the shaft seal seat assembly as shown and gently tap it out
Make sure you remove the complete seal assembly including both the white ceramic portion and the rubber cup... Many do it yourselfers leave the rubber cup inside the seal plate which adds to confusion when installing the new seal
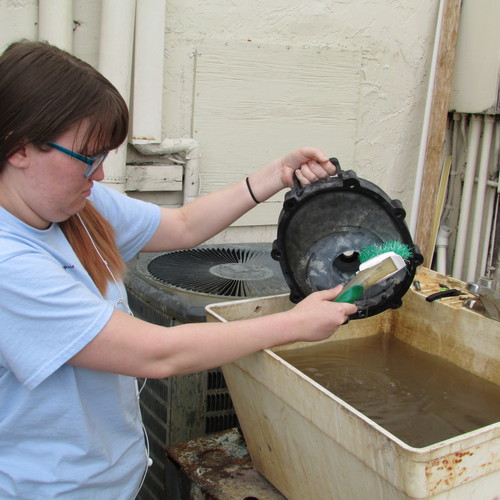
Give the seal plate a good washing, Remove all oil and grease. We like to use tide as it cuts the grease
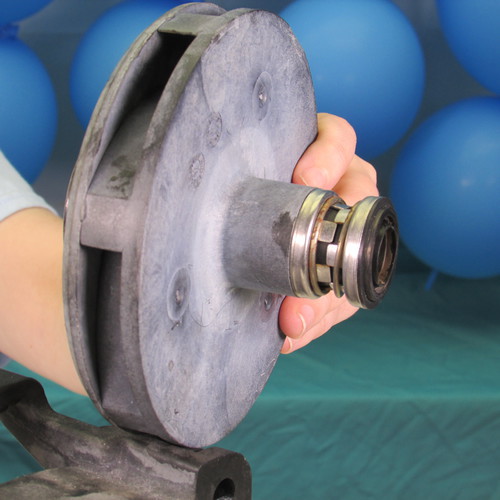
Step 11
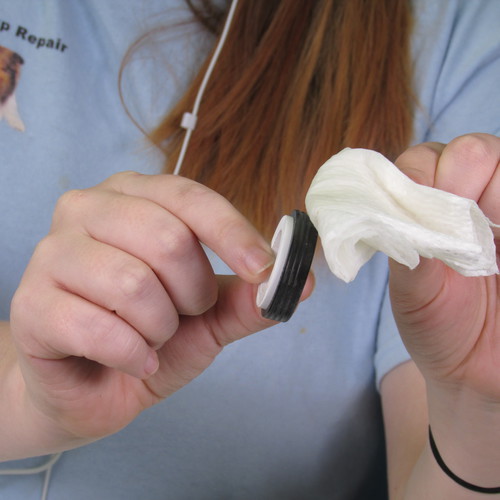
Next we remove the old seal from the impeller by twisting it off with channel lock pliers. Rotate and pull off as shown. This would be a good time to clean and degrease the impeller. Be sure the tail is free of oil and grease
Step 12
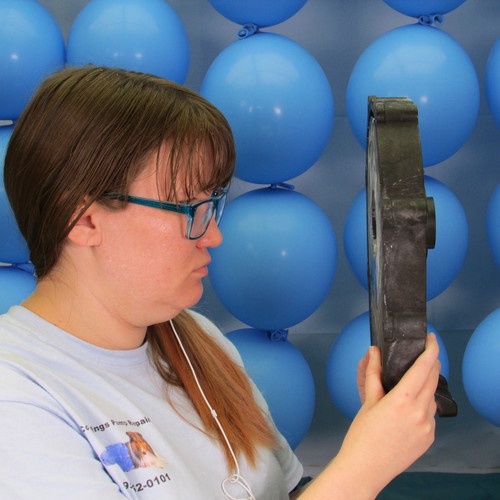
Next we will install the new seal seat in the seal plate.
First inspect the seal plate pay particular attention to the seal seat bore hole, look for distortion or deformation caused by overheating or melting---Do not reinstall a damaged seal plate. If the seal plate looks good continue on...
Step 13
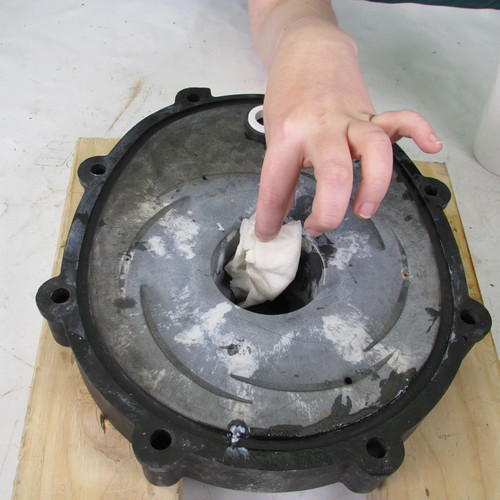
Lubricate the seal seat rubber cup assembly with soapy water--- Do not use oil, grease, magic lube, teflon or silicone... a rubber lubricant such as p80 of us sealube is ok but most DIY'ers don't have it so soap and water is a good safe substitute
Lubricate the seal plate bore
Insert The seal seat into the bore of the seal plate with the white part up as shown
Using the rounded butt of a clean screwdriver, carefully press the seal seat into the seal plate as shown
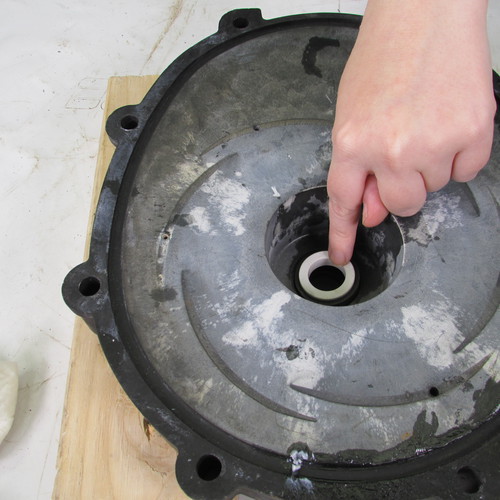
Carefully inspect the seal seal you just installed, make sure it is seated flush, not crooked or cocked
Step 14
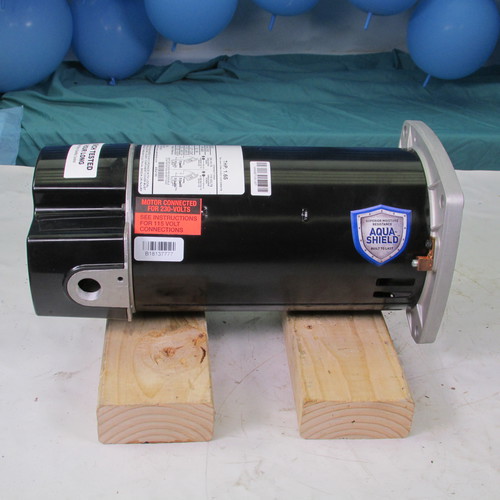
Unbox the new motor and set it on a couple of blocks
or recover your old motor if you are just replacing the seals
Step 15
Reinstall the seal plate on the face of the new motor---be carefull the shaft does not contact the white ceramic seal seat that you installed in the seal plate
Reinstall the (4) 9/16 bolts
Tighten in a clockwise direction
Step 16
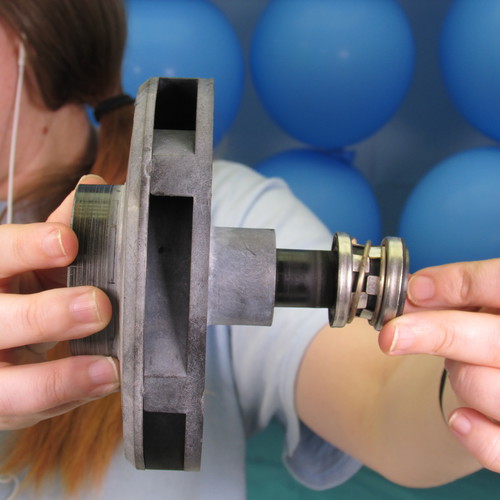
Install the new seal by twisting on the impeller tail as shown. The shiny carbon ring will be outward and the soft rubber side will butt up against the impeller. Lubricate the seal bore and impeller tail with soapy water. Do not use grease, oil, WD-40 magic lube, teflon or silicone. A rubber lubricant such as p80 or us sealube is ok, but must DIYers do not have any, therefore soap and water is a safe substitute
Notice the carbon ring is outward and the metal part is tight against the impeller
Step 17
Install the impeller by twisting on to the shaft in a clockwise or right direction. Do not allow the carbon ring of the seal to contact the motor shaft when installing this. Work very slowly and carefully.
Tighten the impeller clockwise
(Preferably wearing leather gloves)
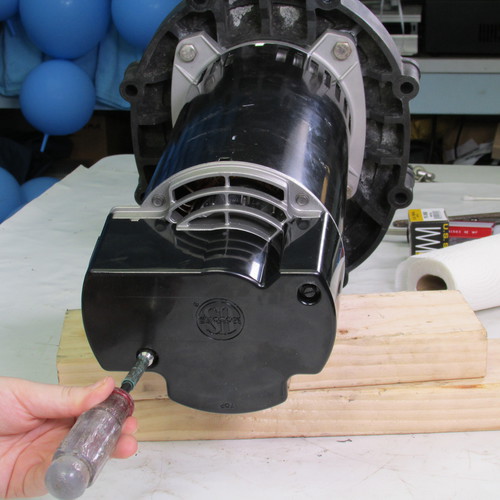
Step 18
Turn the motor and seal plate assembly upside down
and remove the rear cover
Insert a 7/16 wrench as shown to lock the motor shaft
With one hand holding the 7/16 wrench use your other hand to tighten the impeller in a clockwise direction (hand tight is sufficient)
Replace the back cover
Step 19
Next reinstall the impeller lock screw. Be sure that the little rubber oring washer is on the screw behind the screw head . This is a left hand or reverse thread screw so we tighten it in a counterclockwise or left direction
Use the proper tool to tighten the screw. Usually it is a #3 Phillips screwdriver, however we have seen slot head and hex head screws also.
Step 20
Reinstall the diffuser and tighten the (2) screws in a clockwise direction as shown
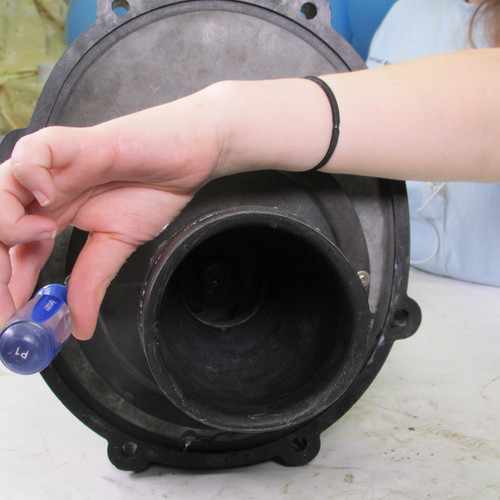
Step 21
Replace the body O'ring by inserting into the groove on the seal plate. You can hold it in place with magic lube or teflon or silicone grease
Step 22
Replace the o'ring on the diffuser
Lubricate with Magic Lube
Step 23
Reinstall the power unit by sliding it into the wet end assembly
Replace the (8) 9/16 hex bolts and washers as shown. Tighten with a 9/16 wrench in a clockwise direction
Step 24
Install a new basket lid O'ring and lubricate with magic lube
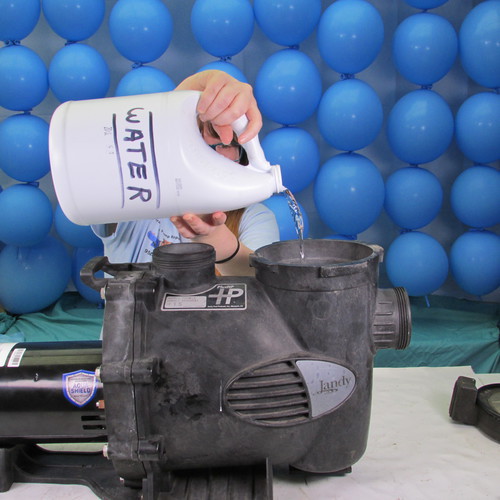
Step 25
Don't forget to fill the pump with water nefore running it.... A gallon or two should be enough
At this point you can discard the old motor, however if you are just repacing the seal, set it aside for reinstallation
These instructions apply to these model numbers: SHPF.50, SHPF.75, SHPF1.0, SHPF1.5, SHPF2.0, SHPF3.0, SHPF5.0, SHPF1.0-2, SHPF1.5-2, SHPF2.0-2, SHPM.75, SHPM1.0, SHPM1.5, SHPM2.0, SHPM2.5, SHPM1.5-2, SHPM2.0-2, SHPM2.5-2, PHPF.50, PHPF.75, PHPF1.0, PHPF1.5, PHPF2.0, PHPF1.0-1, PHPF1.5-2, PHPF2.0-2, PHPM.75, PHPM1.0, PHPM1.5, PHPM2.0, PHPM2.5, PHPM1.5-2, PHPM2.0-2, PHPM2.5-2